In this day and age, it’s more important than ever to be conscious of our carbon footprint. One of the best and most efficient ways to reduce your impact on the environment is by using solar energy. Not only does it reduce emissions from traditional power plants, but it also doesn’t rely on finite resources like oil or coal.
So how exactly does solar energy work? How is solar energy produced? What are the steps involved? Let’s take a closer look!
In this article, we’ll walk you through how solar energy works and the step-by-step process of how it produces solar electricity. We’ll also discuss some of the add-on components you can include in your solar energy system to get the best out of it. So, read on to learn more about solar energy!
What is solar energy? How does it work?
Solar energy is the energy contained in solar radiation in the form of light and heat. We can harness it using a variety of technologies to generate electricity or directly in solar water heaters.
Solar power is harnessed to generate electricity with the help of photovoltaic technology. The process of solar panel electricity generation is known as the photovoltaic effect.
It uses semiconductors such as silicon to convert energy contained in the sunlight to electrical energy. A photovoltaic cell or PV cell or solar cell consists of two types of semiconductors (p-type and n-type) joined together to form a p-n junction.
An electric field exists in the p-n junction that makes it easy for the electrons to jump to the positive side and hole to the negative side. Sunlight is composed of photons that contain small bundles of energy. When sunlight falls on PV cells, the energy from the photons is transferred to the electrons in the semiconductor, making them reach a higher energy level called the conduction band.
The excited electrons jump across the p-n junction to the positive side and as a consequence, the holes move to the negative side. This flow of electrons is called electricity.
The busbars attached to the solar cells collect the electricity generated and carry them to the inverter. The inverter converts the direct current (DC) produced into usable alternating current (AC).
A home solar installation may have more components to make the electricity generated more useful. Here’s a step-by-step guide to how a home solar energy installation works.
How does solar energy work (step-by-step)?
The most visible part of a home solar setup is the solar panel. A solar panel consists of multiple solar cells arranged in a framework and sealed by protective glass. Internal wiring is in place to pool together the electricity generated by all the solar cells in it. Depending on energy needs, a home solar installation may need more than one solar panel.
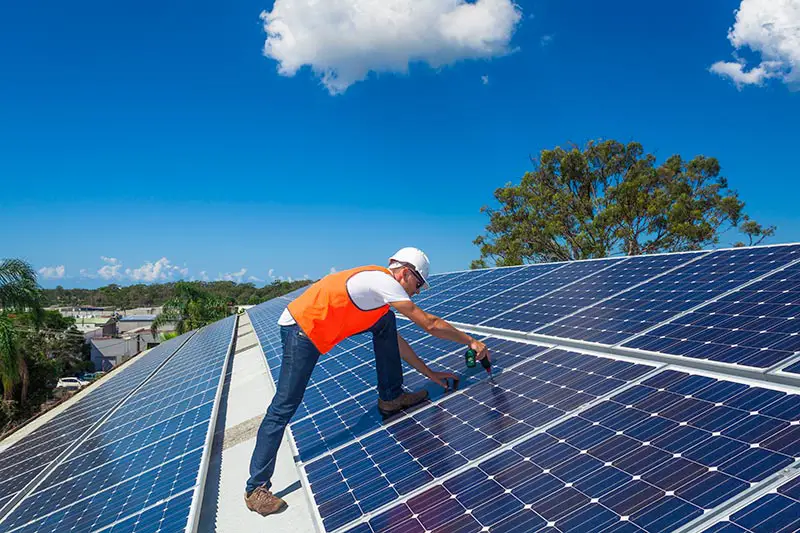
Step 1: Installation of solar panel
Solar panels need to be kept in such a place to receive maximum sunlight. Typically, they are placed on rooftops secured in mounts. All the remaining components of the solar system are kept indoors and connected to the solar panel with proper electric cables.
Basically, there are three types of solar panels for you to choose from – monocrystalline, polycrystalline, and thin-film. They vary in their efficiency, cost, and the way they need to be mounted on rooftops.
Monocrystalline solar cells are made from single silicon crystals and are highly efficient but expensive. A polycrystalline solar cell is made from multiple silicon crystals melted together in a mold. These are less efficient but more affordable.
Thin-film solar cells are made from different photovoltaic materials like cadmium telluride (CdTe), copper indium gallium diselenide (CIGS), and amorphous silicon (a-Si). Though their efficiency is much lower than the other two, thin-film solar cells are cheaper, flexible, light-weight, and easier to handle. The best feature of a thin-film panel is that it works even in shades or indirect sunlight.
Depending on the availability of sunlight in your location, space constraints for setting up the solar panels, angle, and orientation of the rooftop, and your energy needs, you need to choose solar panels.
You have diverse choices in the mounting technology as well. Besides the simple fixed rooftop or ground mounts, you can choose from tilting mounts or solar trackers. Again, your location and requirement are the deciding factors while choosing the right mount for your solar panels.
You can fix them yourself if you think you have sufficient knowledge and are up for it. Or else, you can get the help of professional solar installers to do the work for you.
Related:
Step 2: Connect the solar panels to the inverter
When the sun is shining, the solar panels produce electricity. The solar panels generate direct current or DC that have only limited use. Most of the home appliances work on alternating current or AC. To convert DC to AC you need an inverter.
Electric cables are used to connect the solar panels on the rooftop with the inverter kept indoors. Typically, the rest of the components of a home solar system are kept near the main switchboard.
The choices available for inverters are string inverters, microinverters, and power optimizer systems. A string inverter is the most popular as it is effective in most circumstances and cost-effective. The improvements in technology in recent years have made string inverters work well in a wider set of circumstances.
Step 3: The inverter is connected to the switchboard
Now that the inverter has converted the electricity generated to alternating current, it is ready for use in electrical devices and appliances at home. As the wiring is already in place at home to various power points from the switchboard, all you need to do is feed the solar power generated to the switchboard. This way, it will reach all electrical appliances at home.
If you are using only solar power for your energy needs, this is a simple step. However, if you are already connected to the grid and using solar power as an add-on, the connection will be more complex. The wiring will be done in such a way that the power from the solar system is prioritized over the grid power. Only when it is insufficient or not available, the switchboard will draw power from the grid.
If your solar power system is generating more power than you are using, you can include net-metering to sell the excess energy generated to the grid. However, this will require additional arrangements at the switchboard. It also includes a bi-directional meter to keep tabs on the energy drawn from the grid and that exported to the grid. The cost of exported energy may be paid as credits or in cash.
Step 4: Solar batteries are optional
If you want to be grid-free and your system is producing surplus solar energy, it would be advisable to include a solar battery in the system. Your solar power system can generate energy only during the day hours when the sun is shining. If you are not connected to the grid and want to manage your energy needs solely using the solar system, battery backup is the only option left for you.
The battery will store the excess energy generated during the daytime for use at night. You can also use a battery backup if your location doesn’t have a net-metering arrangement.
A solar battery can be connected to the solar inverter or the switchboard. Batteries can store DC and at the time of discharge, an inverter can convert it into AC. This would need a hybrid solar inverter that can handle multiple levels of conversions.
Or else, batteries can store AC after the inverter has converted it. Batteries connected to the switchboard are known as “AC Coupled”. These batteries have internal inverters to convert AC back to DC to store it and it is converted back to AC at the time of discharge.
Even though these multiple conversions may sound ludicrous, in practice, this offers a seamless experience to the user.
These are the main components of solar energy systems and how they work to generate electricity. Some of the minor parts of the solar system include solar power system disconnects, battery charge controllers, and surge protection devices.
In case, your location doesn’t get sufficient sunlight to generate electricity for your needs, you may consider concentrated solar power systems that use lenses and mirrors to concentrate a large area of sunlight onto a receiver.
Bottom line
The sun is the main energy source for our earth, and it’s also one of the most powerful sources available to us. Among all the renewable energy sources, solar power is the most easily accessible source of energy worldwide. With a little help from solar panels, you can harness this power right in your own home!
We hope this has been a helpful introduction to solar power and the process of generating it.
Recommended Reading: